
Linux Server - Install RedHat 9.4
Summary
Instructions on the install and configuration of a Linux server for Kiwiplan.
Details
Prerequisites
VMware, KVM, Hyper-V machine to host the installation
You will need to use the following command when you vi your files as you cut and paste:
Once in vi you have to hit the colon and then type “set paste”
:set pasteThis will not mess with the paste you put in.
Instructions
Preparing the OS
This is to install the OS on a VmWare
VMWare Setup using GUI
Boot ISO
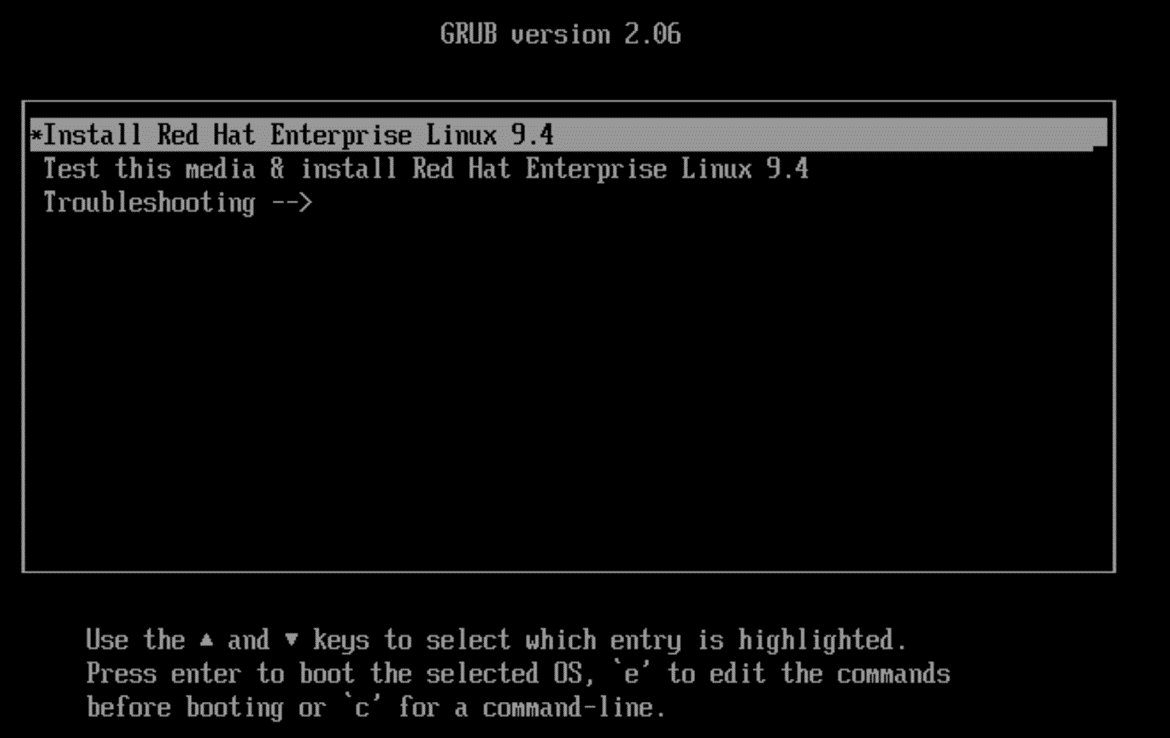
Select “Install RedHat Linux”
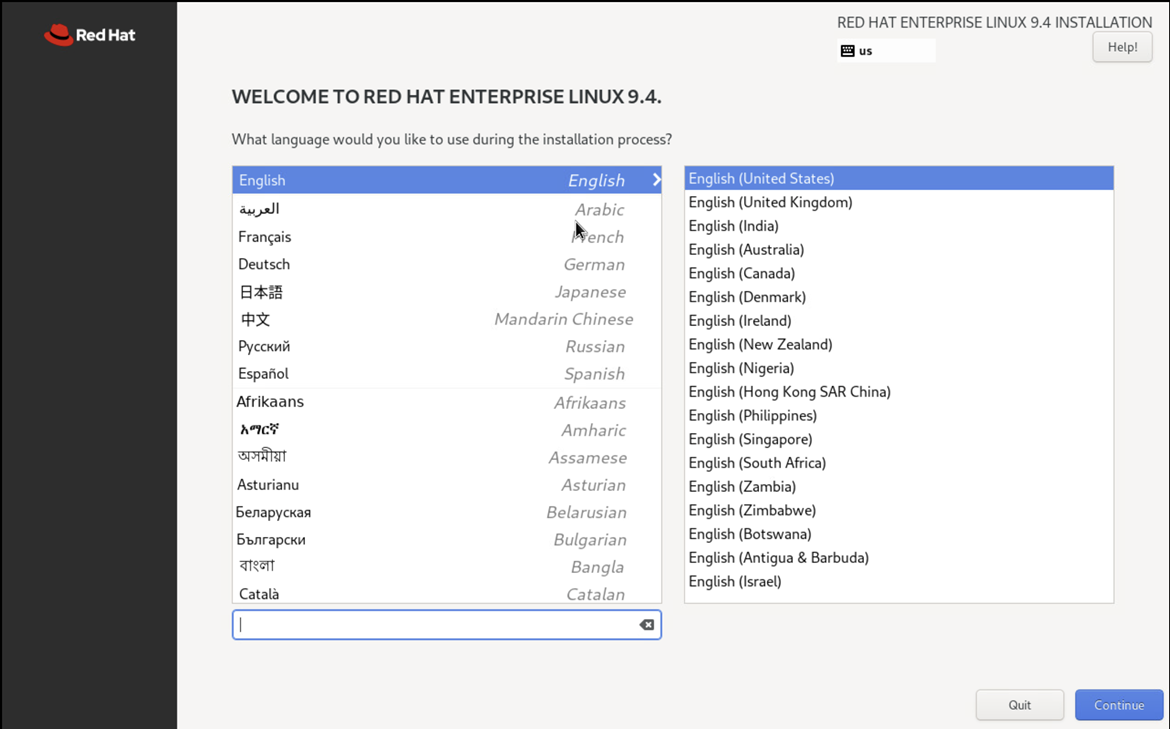
Select Language
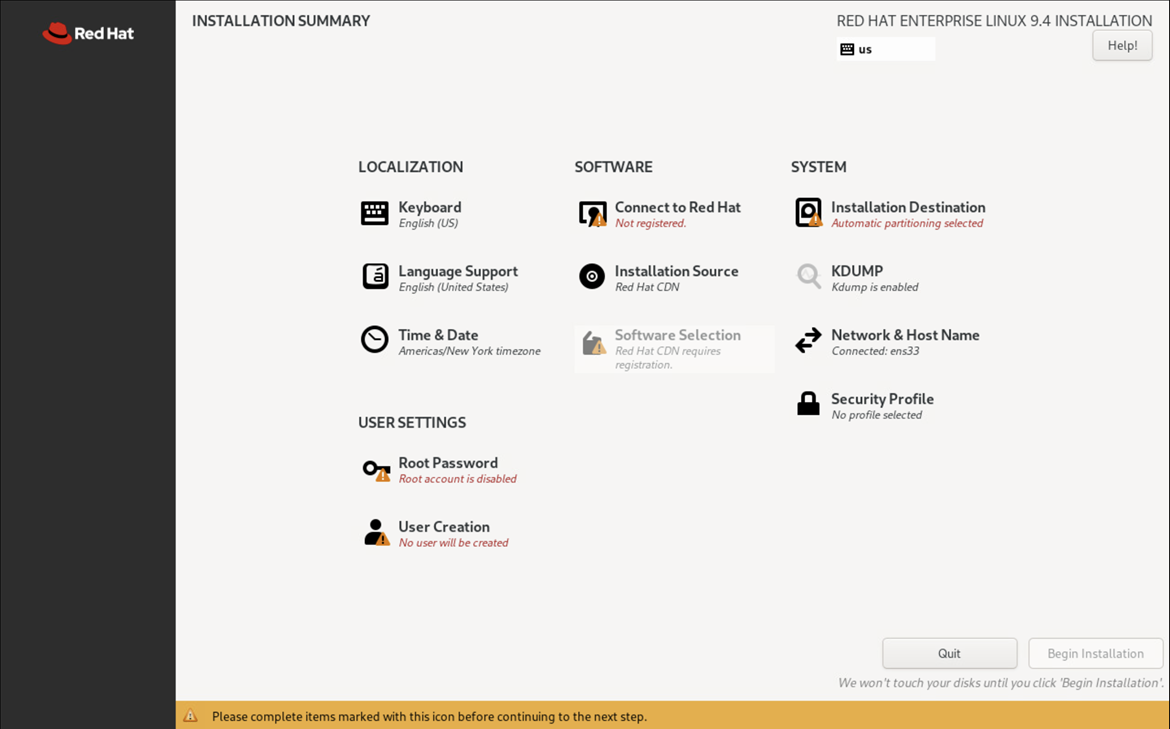
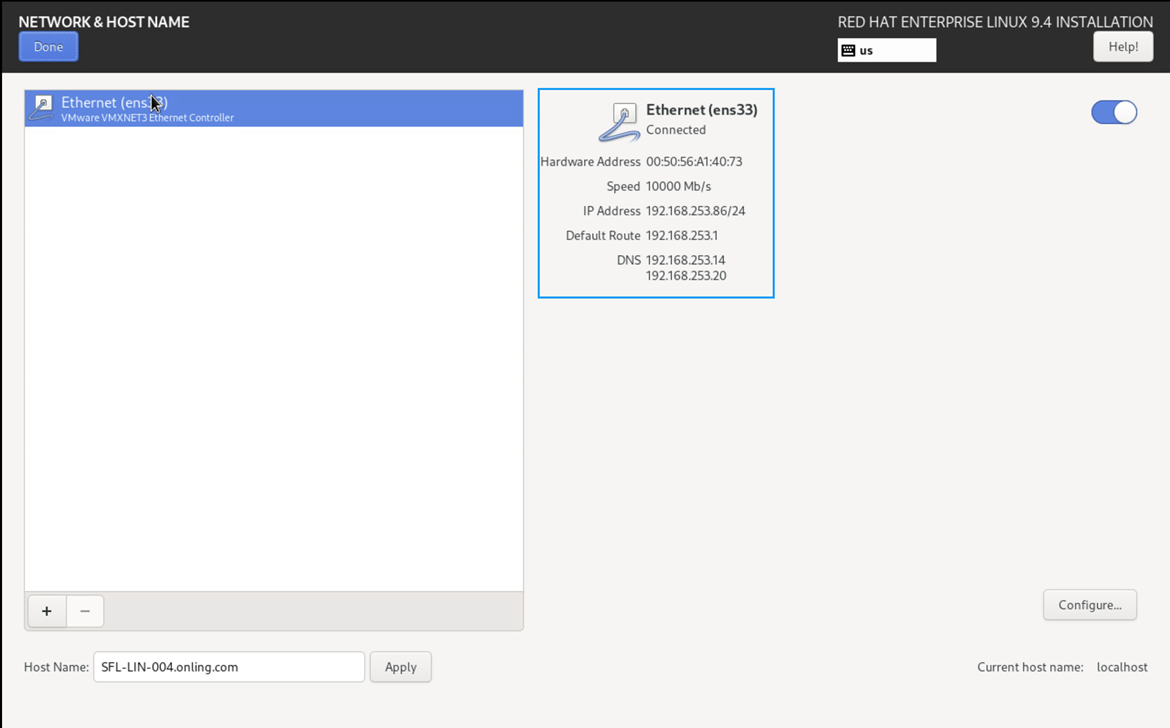
Then Select “Network & Hostname” from install menu.
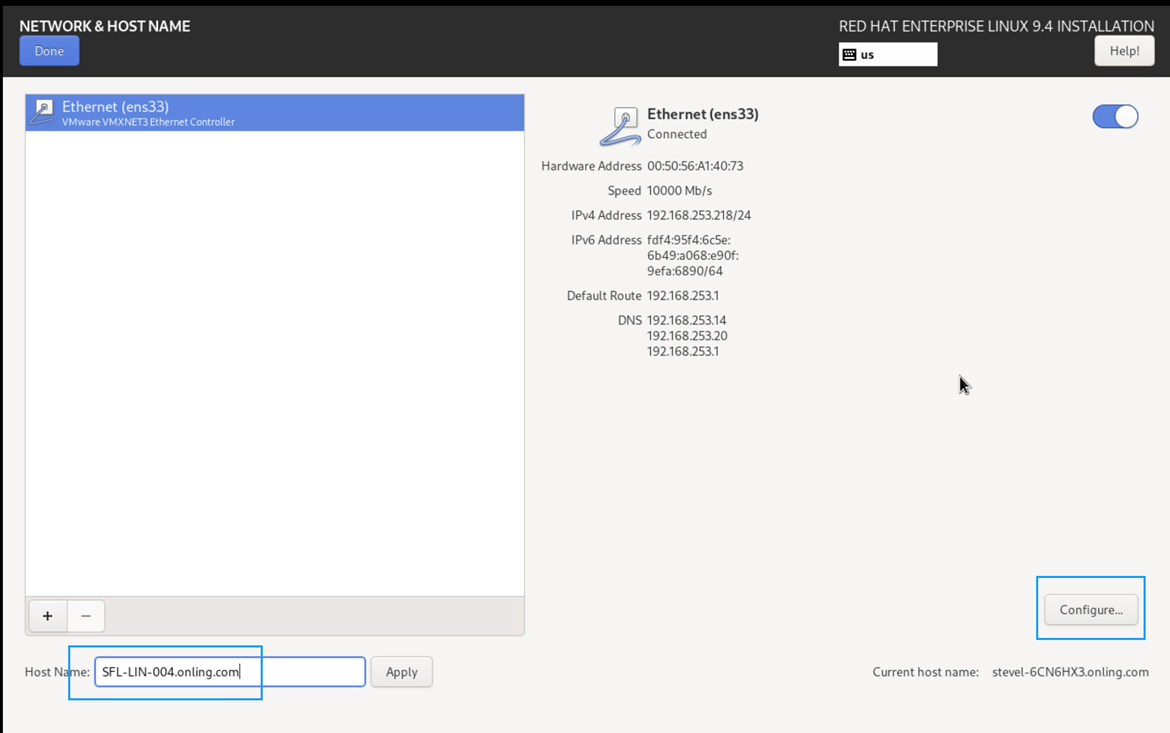
Set hostname and hit apply
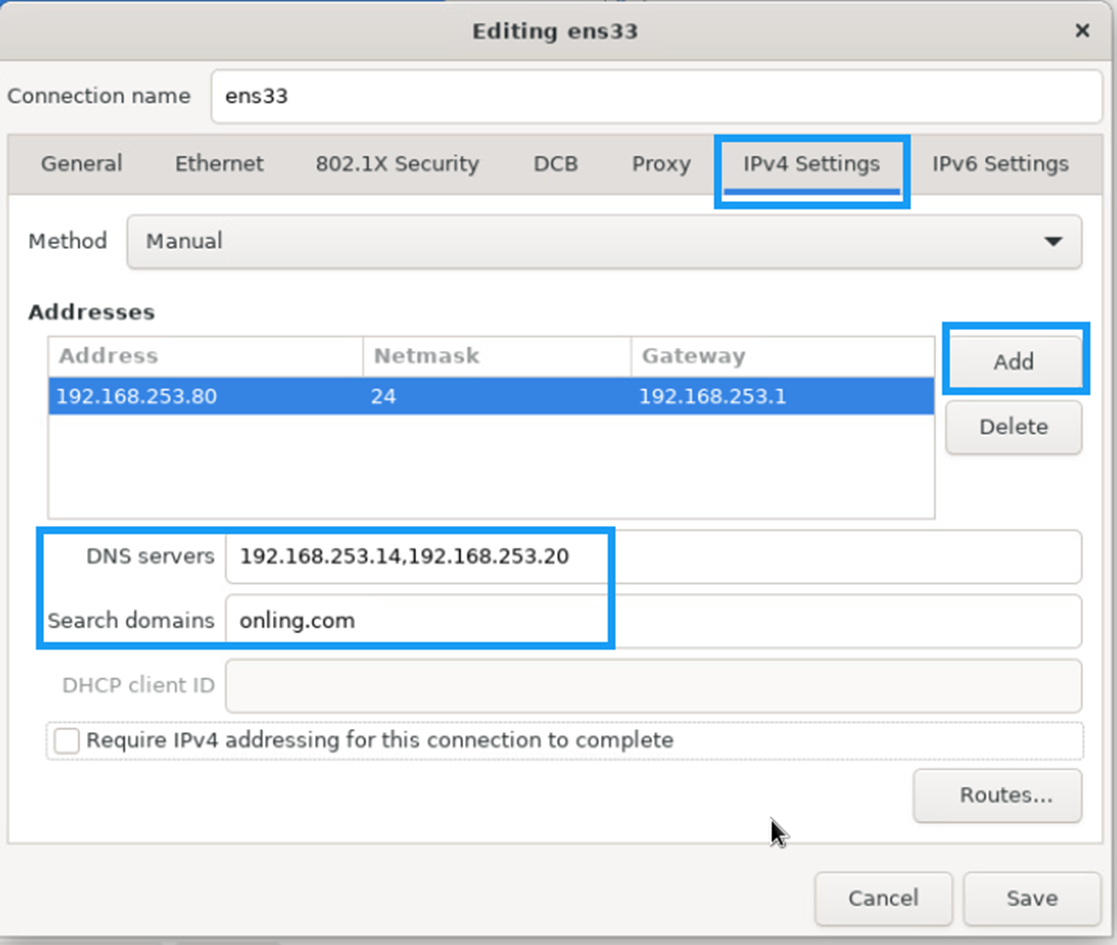
Click Configure and set the IP
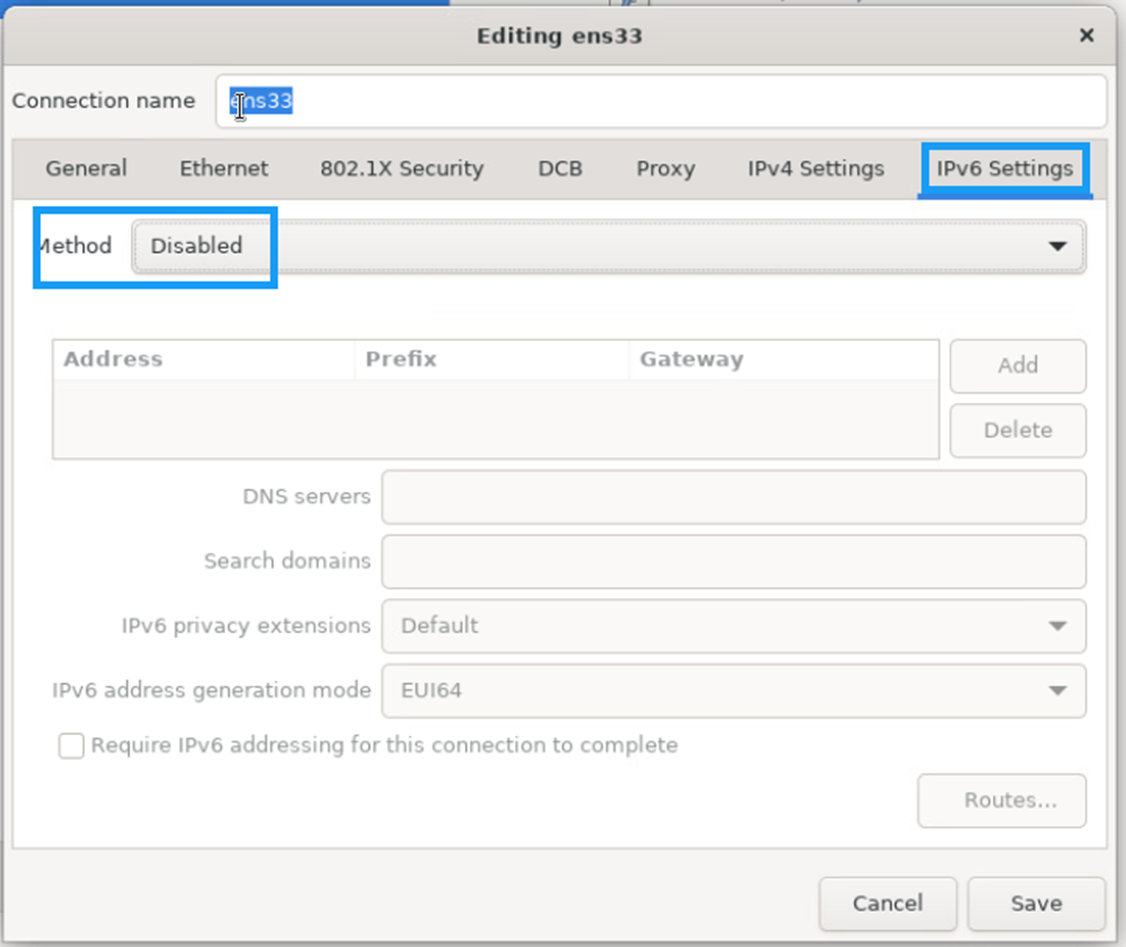
Click on IPv6 Settings and disable it
Select “Installation Destination”
Make sure you select custom to configure the drives and click done
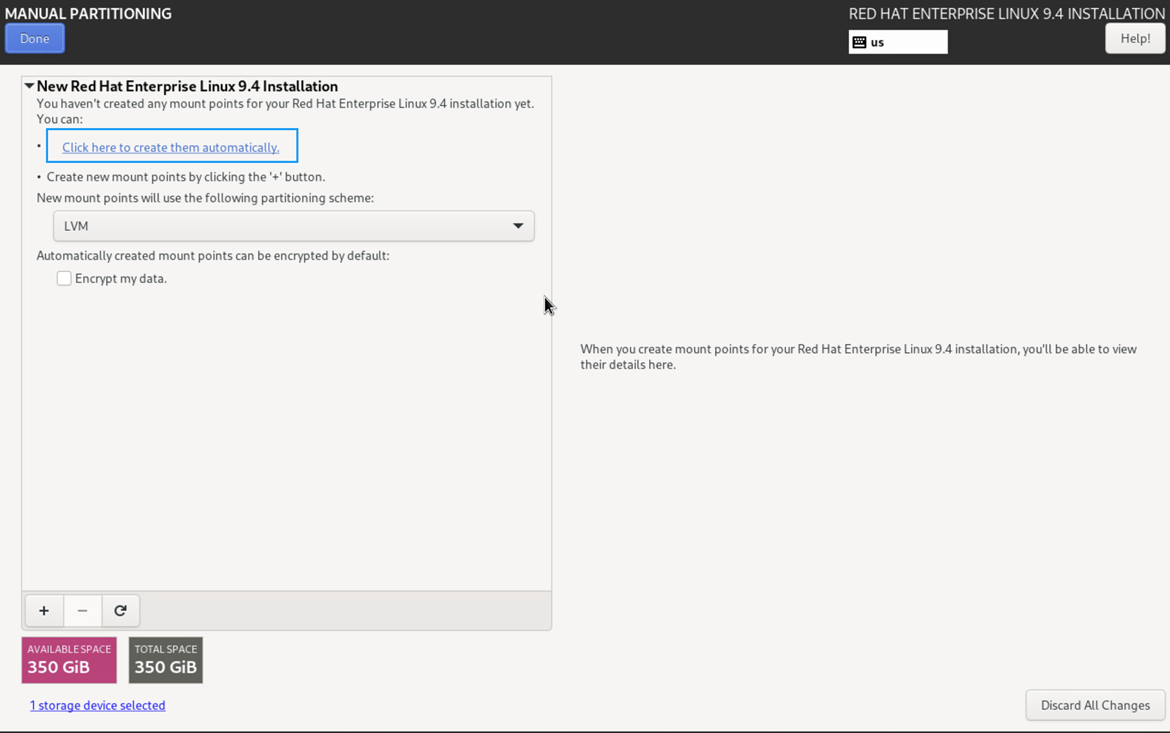
Click on the blue link to auto configure them
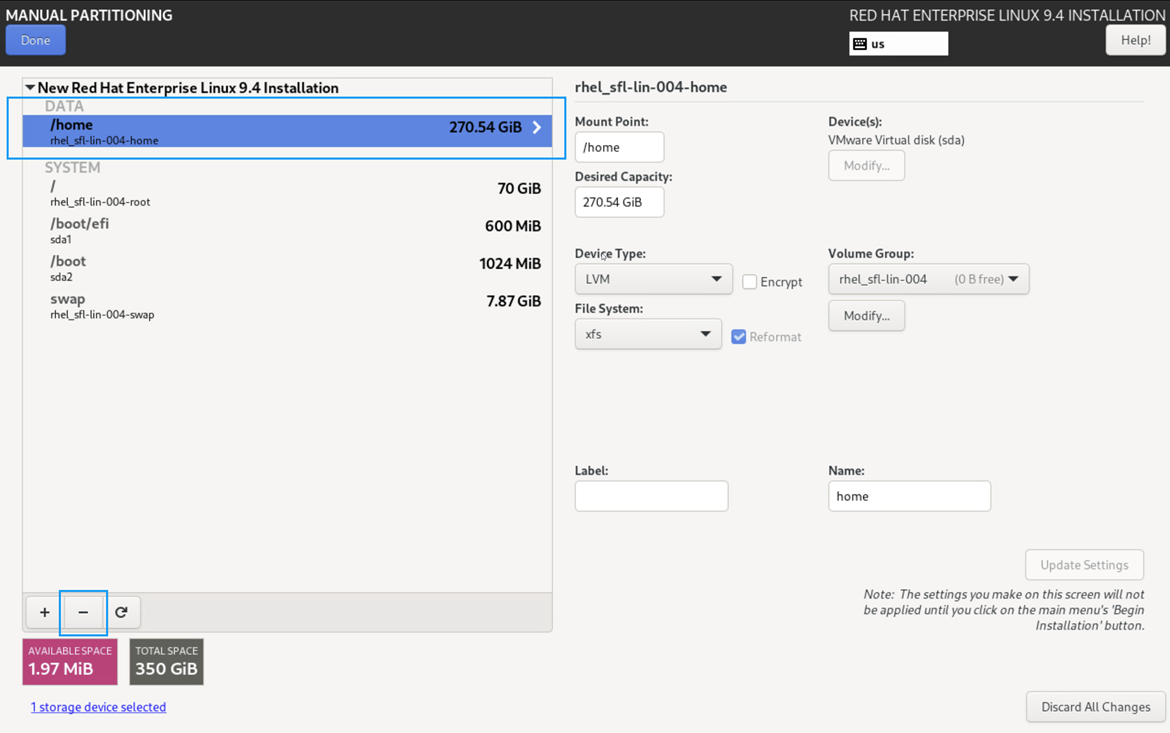
Make sure the /home drive is highlighted and click the “-“ minus sign to remove that drive
Add the pink value of the space available after the delete of the home folder.
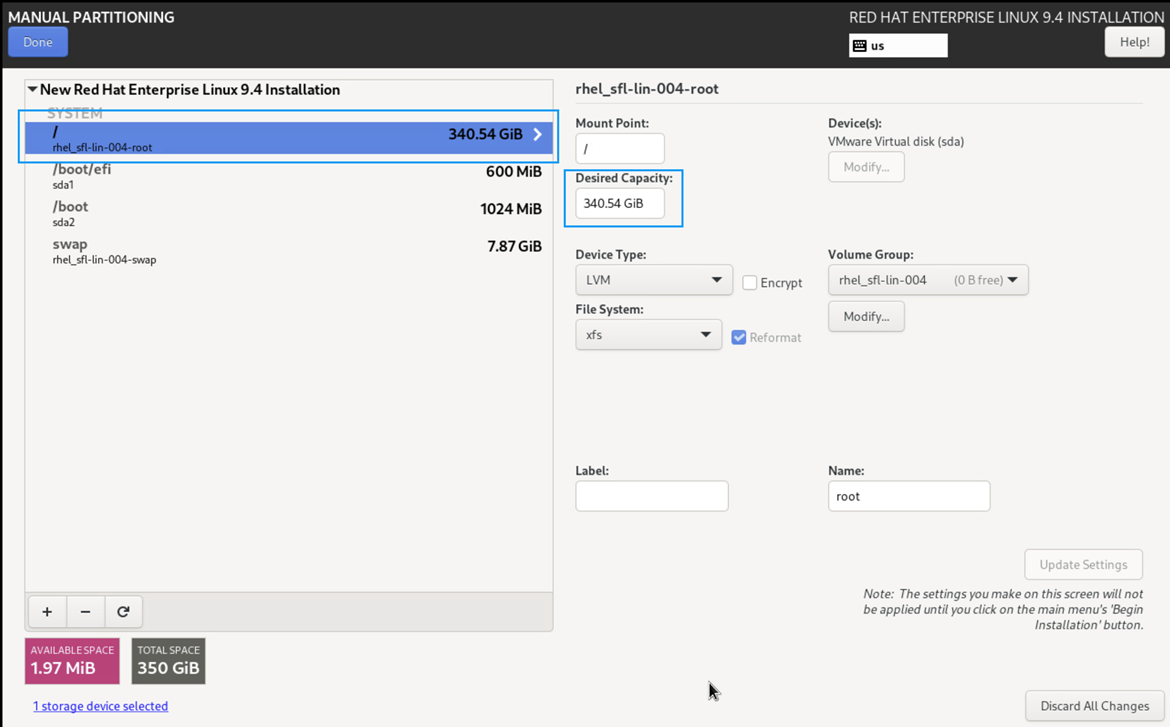
Enter “350 GiB” (total of drive space you created for the VM), this will recalculate the size of the drive and then hit “Done”.
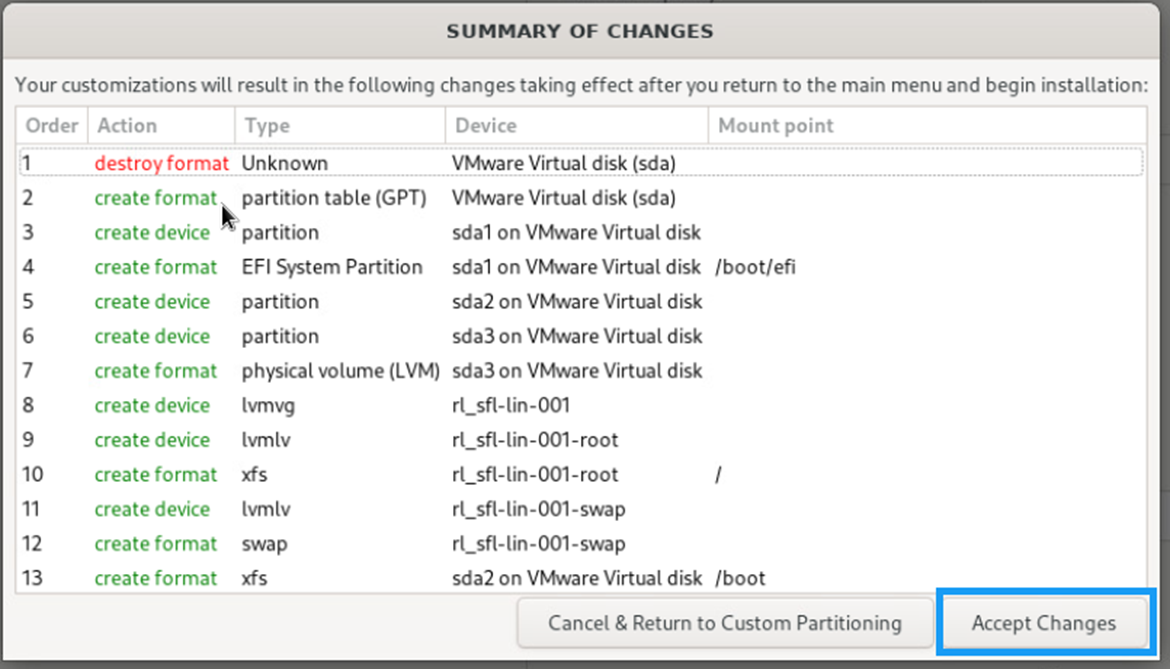
Hit “Accept Changes”
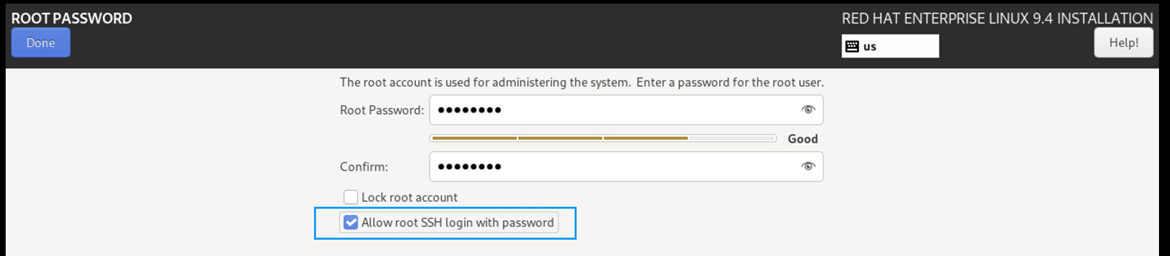
Click on the “Root Password” and click “Allow root SSH login with password” and then click “Done”
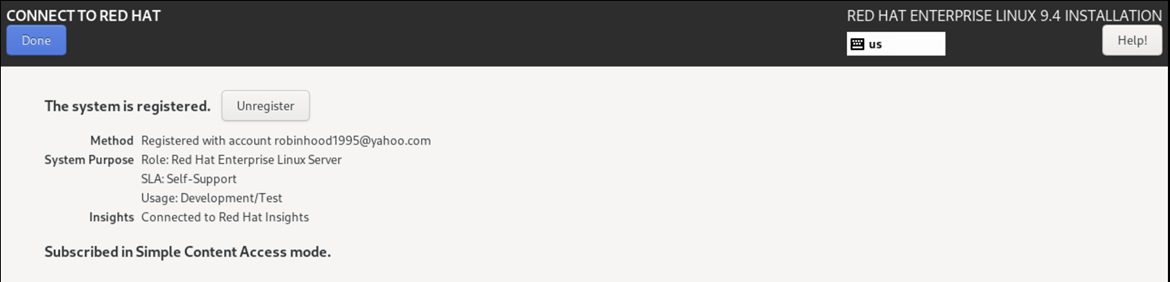
Click “Connect to Redhat”
Enter you Account details unless you are building a VM template, if not then select the purpose of the server then click on “Register”
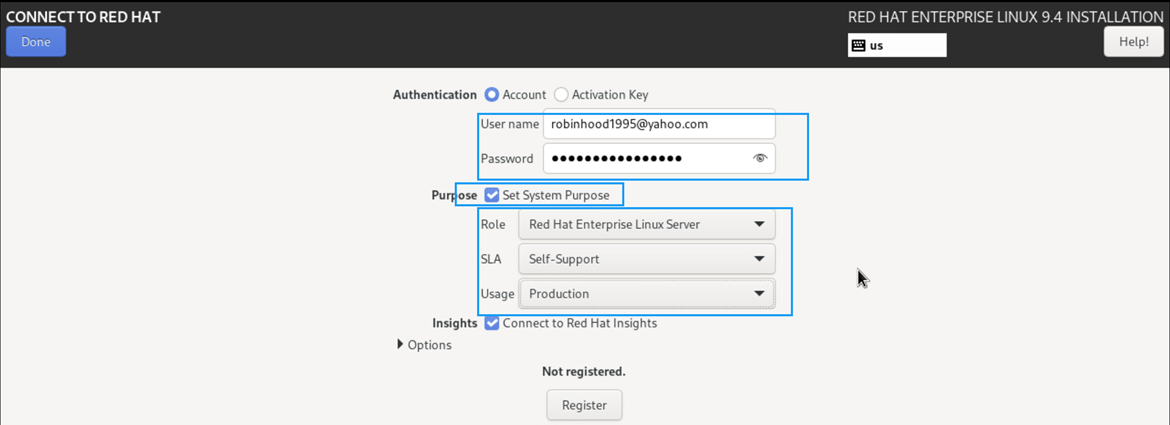
Click on “Done”
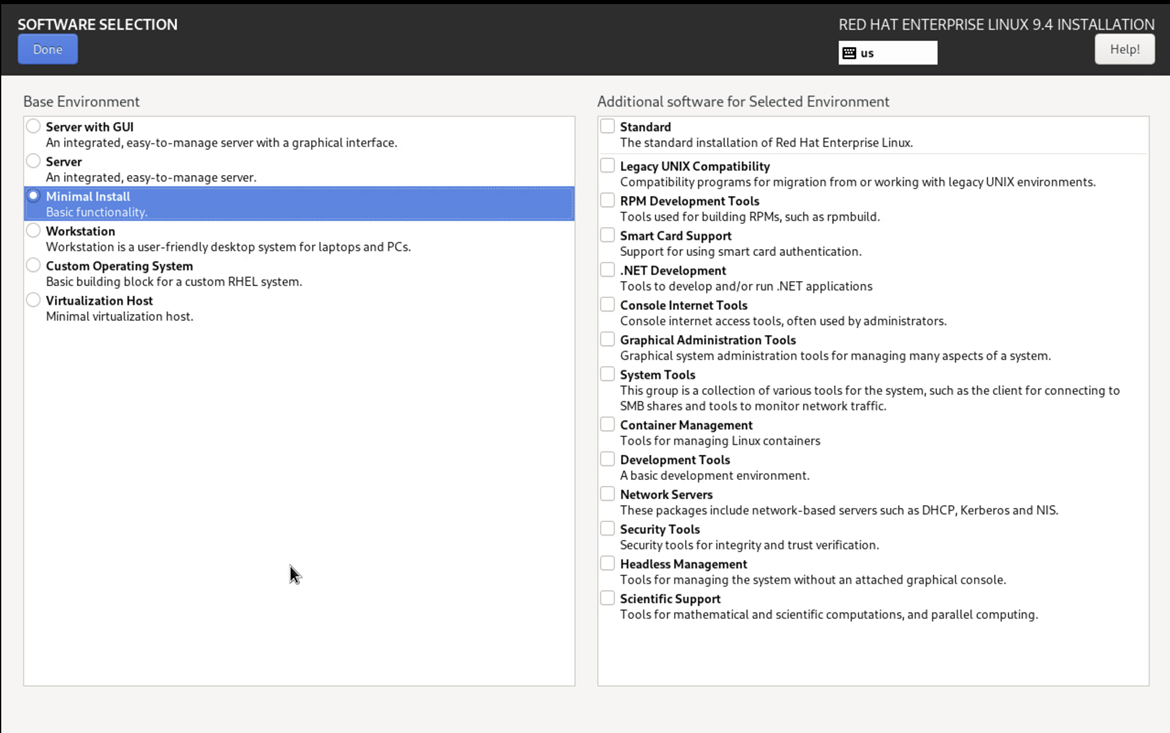
Click “Software Selection” and select “Minimal Install”
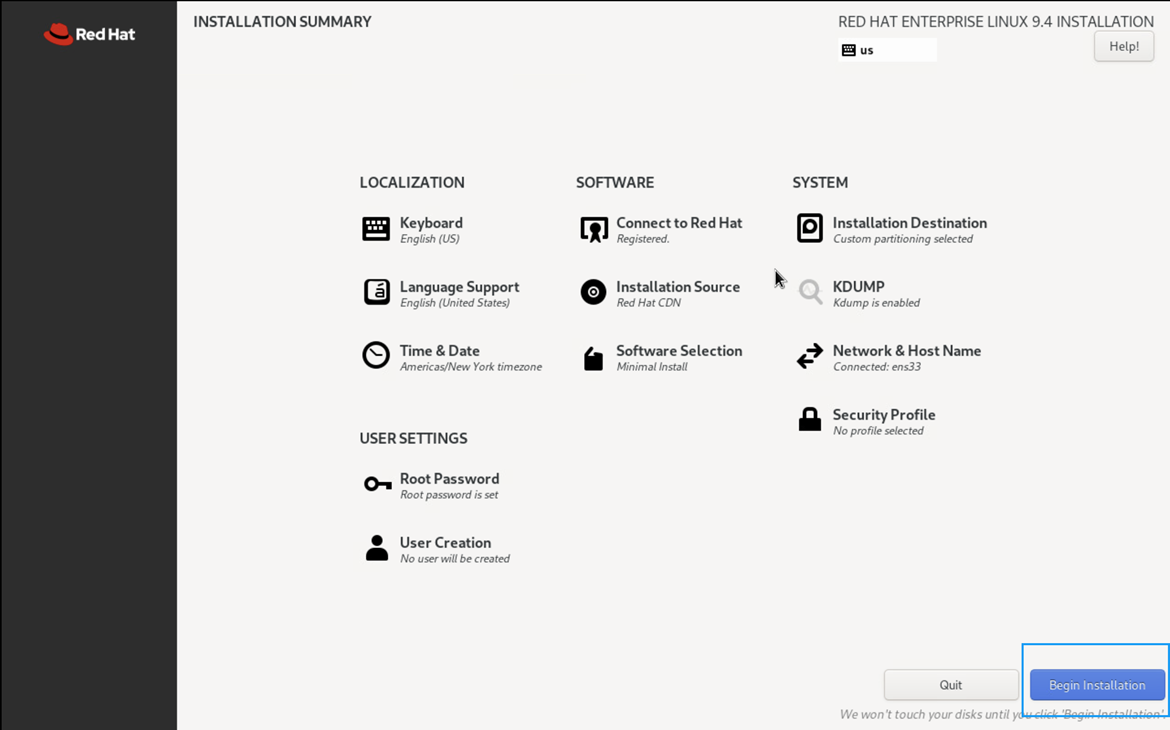
Click “Begin Installation”
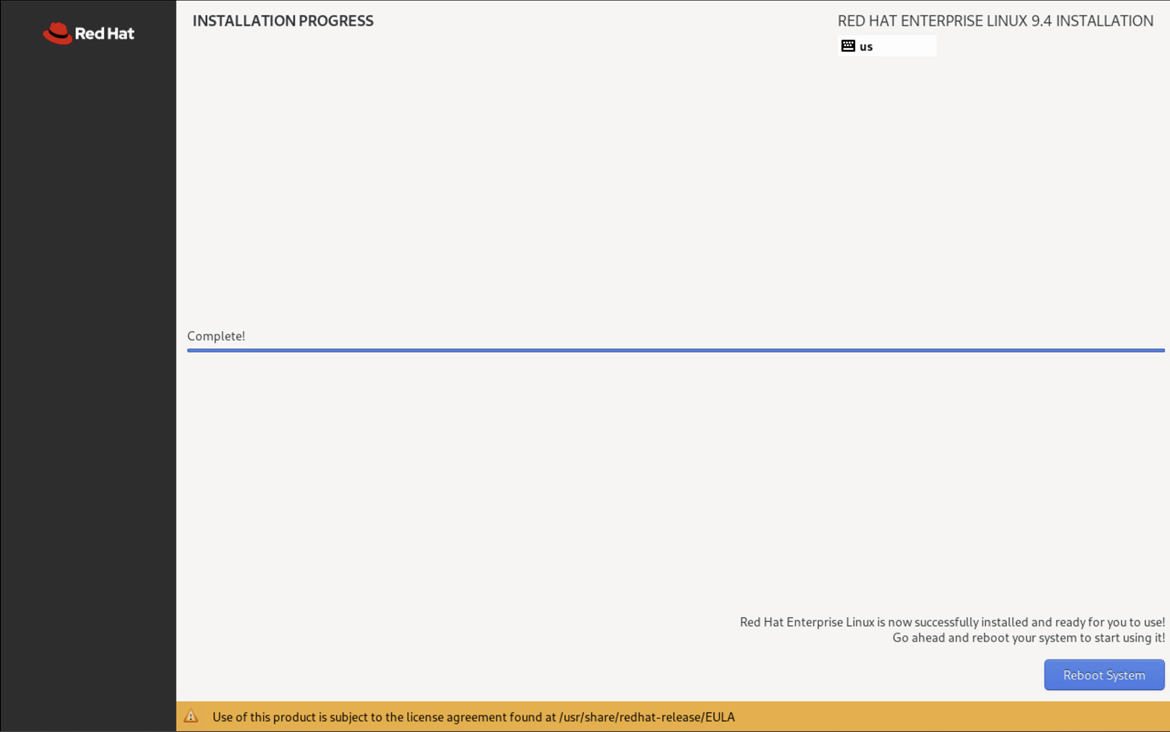
When finished click on “Reboot System”
Network Text GUI
Login with root
NOTE: Run # nmtui Only if you did not do the GUI version
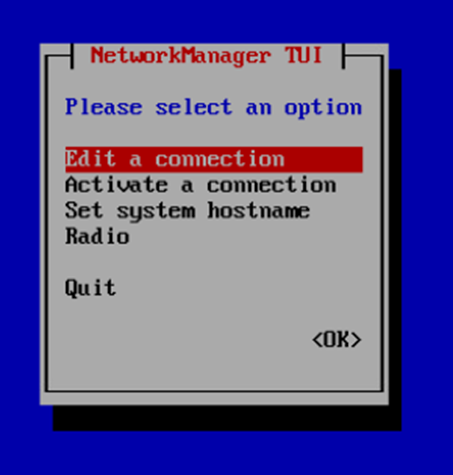
Select Edit connection
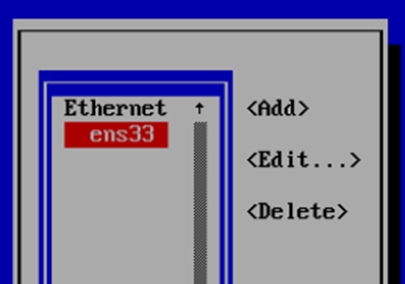
Select interface and hit enter
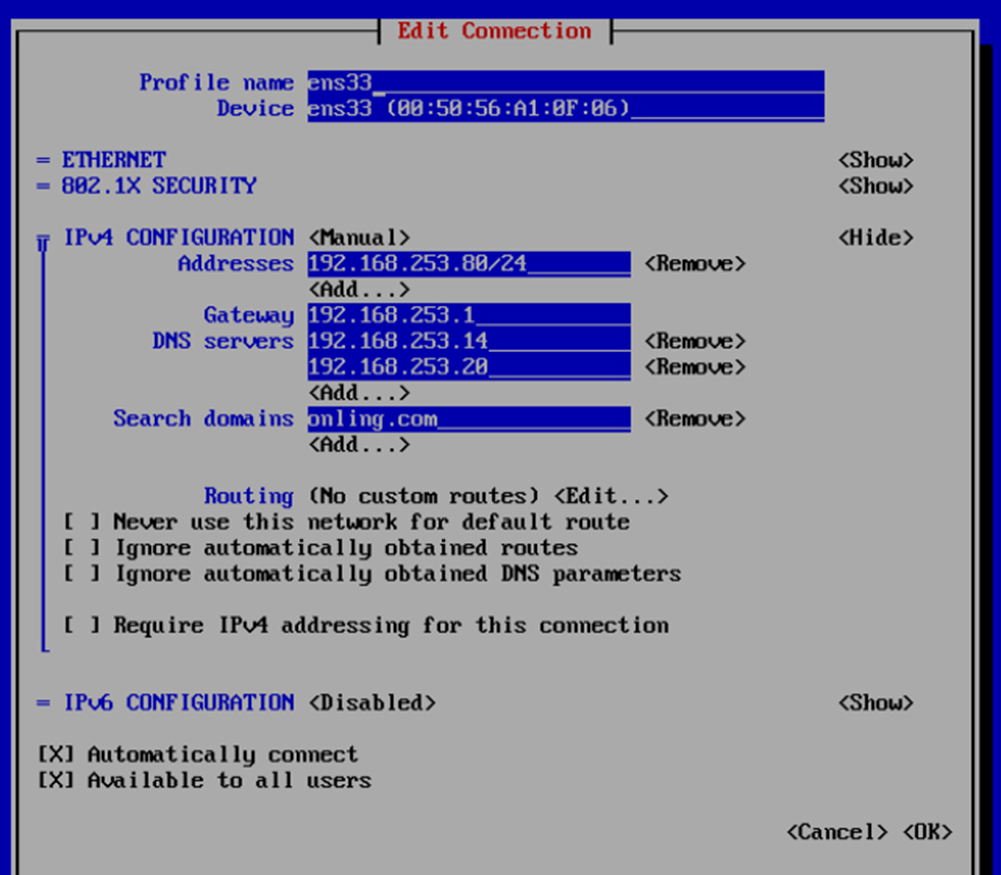
IPV4 change to manual and select show, fill in the information
IPV6 Change to disabled, press OK
Highlight Automatically connect and press the space bar
press OK
Start setup Instructions for RedHat Linux
Connect to the Server
Use a SSH connection to the server the remaining of the commands in order to cut and pates them in instead of using the VM interface.
Commands to run
This will show all command that need to be ran to update within the OS to start the configuration.
All the command are within each box
Update the System
After install update system packages for the needed configuration.
dnf upgrade -yDisable SeLinux
setenforce 0
sed -i 's/^SELINUX=.*/SELINUX=disabled/g' /etc/selinux/config
File is located here if you wish to edit manually
vi /etc/sysconfig/selinuxDisable firewall
systemctl disable firewalld.serviceEpel Release
subscription-manager repos --enable codeready-builder-for-rhel-9-$(arch)-rpms
dnf install https://dl.fedoraproject.org/pub/epel/epel-release-latest-9.noarch.rpm
After Epel installation rerun the upgrade to update if any are needed
dnf upgrade -yInstall core software
Install Packages
Add the needed packages
Install required system packages
dnf install bind-utils bzip2 cups cifs-utils enscript ftp gdb ghostscript java-1.8.0-openjdk-headless java-11-openjdk-headless krb5-workstation ksh lftp lrzsz lsof libnsl lzop mariadb-server mlocate mutt ncompress net-tools net-snmp net-snmp-utils net-tools nfs-utils nmap nvme-cli openldap-clients openssh-clients psmisc realmd rsync samba-client strace sysstat tcpdump telnet telnet-server tmux unix2dos vim vim-enhanced vsftpd wget xfsdump vsftpd htop mc rsyslog rsyslog-doc postfix dbus-daemon s-nail dovecot -yIf you are running on a virtual machine run the following
dnf install open-vm-tools -y
sysctl vm.swappiness=10
Install vim color for scripting
dnf install git -y
git clone https://github.com/flazz/vim-colorschemes ~/.vim/
cp ~/.vim/colors/desert.vim /etc/vimrc.local
Configure Installed Packages
Configure the packages
Enable Telnet run the following to enable and start the packages
systemctl enable --now telnet.socketEnable Time Synchronization run the the following and add your domain time server
vi /etc/chrony.confAdd your server below the following and make sure you change the domain name from sflservicesllc.com
# These servers were defined in the installation:
#server _gateway iburst
server domain.sflserviesllc.com
Enable Time Synchronization
systemctl enable --now chronydNote: Time-zone changes are made with the command
timedatectlEnable FTP run the following
vi /etc/vsftpd/vsftpd.confMake the following changes within the file
anonymous_enable=NO
local_umask=002
ascii_upload_enable=YES
ascii_download_enable=YES
Start and Enable FTP for transfer in and out for us or other vendors
systemctl enable --now vsftpd.serviceIf you have a remote logging server setup then edit the following command
vi /etc/rsyslog.confThen add the following at the end of the file but make sure you update the IP address and replace the XXX's
*.* @192.168.XXX.XXX:514   # use @ for UDP Protocal
*.* @@192.168.XXX.XXX:514   # use @@ for TCP Protocal
Enable Rsyslog to enable logging locally and remotely
systemctl enable --now rsyslogConfigure Postfix for Email run the following
vi /etc/postfix/main.cfUpdate the following with your email server
relayhost = [ENTER IP or SMTP SERVER] or [sflservicesllc-com.mail.protection.outlook.com]:25Optional if you want to hardcode a domain name run the following
vi /etc/postfix/main.cfUpdate the following with a remote or local email server and make sure you change the domain name from sflservicesllc.com
myhostname = sflservicesllc.com

mydomain = sflservicesllc.com

mydestination =

relayhost = [ENTER IP or SMTP SERVER] or [sflservicesllc-com.mail.protection.outlook.com]:25
Optional f you do not have a email remote/local server
vi /etc/postfix/main.cfUpdate the following for no email server and make sure you change the domain name from sflservicesllc.com
myhostname = sflservicesllc.com

mydomain = sflservicesllc.com

mail_spool_directory = /var/mail

mynetworks = 127.0.0.0/8, 168.100.189.0/28
Enable Postfix
systemctl enable --now postfixTest your config this way
echo "Install of Linux Rocks $HOSTNAME" | sendmail steve.ling@sflservicesllc.comLocale add-ons to make sure that ANSI applications display correctly so edit the following and replace all of the values with the following
Edit the following:
vi /etc/locale.confChange the following:
LANG="en_US"
SUPPORTED="en_GB:en_GB-.UTF-8:en_US:en_US.UTF-8:de_DE:de_DE.UTF-8"
SYSFONT="latarcyrheb-sun16"
Once added the locals exit and telnet back into the server to take the update
Bash colors and Prompt
Bash for root for color edit the following
vi ~/.bashrcThen add all at the bottom
alias vi='vim'
alias tailf='tail -f'

LS_COLORS='rs=0:di=01;44:ln=01;36:mh=00:pi=40;33:so=01;35:do=01;35:bd=40;33;01:cd=40;33;01:or=40;31;01:su=37;41:sg=30;43:ca=30;41:tw=30;42:ow=34;42:st=37;44:ex=01;32:*.tar=01;31:*.tgz=01;31:*.arj=01;31:*.taz=01;31:*.lzh=01;31:*.lzma=01;31:*.tlz=01;31:*.txz=01;31:*.zip=01;31:*.z=01;31:*.Z=01;31:*.dz=01;31:*.gz=01;31:*.lz=01;31:*.xz=01;31:*.bz2=01;31:*.bz=01;31:*.tbz=01;31:*.tbz2=01;31:*.tz=01;31:*.deb=01;31:*.rpm=01;31:*.jar=01;31:*.rar=01;31:*.ace=01;31:*.zoo=01;31:*.cpio=01;31:*.7z=01;31:*.rz=01;31:*.jpg=01;35:*.jpeg=01;35:*.gif=01;35:*.bmp=01;35:*.pbm=01;35:*.pgm=01;35:*.ppm=01;35:*.tga=01;35:*.xbm=01;35:*.xpm=01;35:*.tif=01;35:*.tiff=01;35:*.png=01;35:*.svg=01;35:*.svgz=01;35:*.mng=01;35:*.pcx=01;35:*.mov=01;35:*.mpg=01;35:*.mpeg=01;35:*.m2v=01;35:*.mkv=01;35:*.ogm=01;35:*.mp4=01;35:*.m4v=01;35:*.mp4v=01;35:*.vob=01;35:*.qt=01;35:*.nuv=01;35:*.wmv=01;35:*.asf=01;35:*.rm=01;35:*.rmvb=01;35:*.flc=01;35:*.avi=01;35:*.fli=01;35:*.flv=01;35:*.gl=01;35:*.dl=01;35:*.xcf=01;35:*.xwd=01;35:*.yuv=01;35:*.cgm=01;35:*.emf=01;35:*.axv=01;35:*.anx=01;35:*.ogv=01;35:*.ogx=01;35:*.aac=00;36:*.au=00;36:*.flac=00;36:*.mid=00;36:*.midi=00;36:*.mka=00;36:*.mp3=00;36:*.mpc=00;36:*.ogg=00;36:*.ra=00;36:*.wav=00;36:*.axa=00;36:*.oga=00;36:*.spx=00;36:*.xspf=00;36:';
export LS_COLORS

export PS1="\\[$(tput bold)\\]\\[$(tput setaf 1)\\]\\[$(tput setab 8)\\]
"\\u\\[$(tput setaf 5)\\]@\\[$(tput setaf 1)\\]`hostname`"\\[$(tput setaf 2)\\] : ""`uname`"" : \\[$(tput setaf 6)\\]""\d \t : ""`echo $PLANTID`""
"[\\w]'\$\[$(tput sgr0)\] '
Bash for all new users edit the following
vi /etc/skel/.bashrcThen add below the “# User specific aliases and functions” after “unset rc” section
alias rm='rm -i'
alias cp='cp -i'
alias mv='mv -i'
alias vi='vim'
alias tailf='tail -f'

LS_COLORS='rs=0:di=01;44:ln=01;36:mh=00:pi=40;33:so=01;35:do=01;35:bd=40;33;01:cd=40;33;01:or=40;31;01:su=37;41:sg=30;43:ca=30;41:tw=30;42:ow=34;42:st=37;44:ex=01;32:*.tar=01;31:*.tgz=01;31:*.arj=01;31:*.taz=01;31:*.lzh=01;31:*.lzma=01;31:*.tlz=01;31:*.txz=01;31:*.zip=01;31:*.z=01;31:*.Z=01;31:*.dz=01;31:*.gz=01;31:*.lz=01;31:*.xz=01;31:*.bz2=01;31:*.bz=01;31:*.tbz=01;31:*.tbz2=01;31:*.tz=01;31:*.deb=01;31:*.rpm=01;31:*.jar=01;31:*.rar=01;31:*.ace=01;31:*.zoo=01;31:*.cpio=01;31:*.7z=01;31:*.rz=01;31:*.jpg=01;35:*.jpeg=01;35:*.gif=01;35:*.bmp=01;35:*.pbm=01;35:*.pgm=01;35:*.ppm=01;35:*.tga=01;35:*.xbm=01;35:*.xpm=01;35:*.tif=01;35:*.tiff=01;35:*.png=01;35:*.svg=01;35:*.svgz=01;35:*.mng=01;35:*.pcx=01;35:*.mov=01;35:*.mpg=01;35:*.mpeg=01;35:*.m2v=01;35:*.mkv=01;35:*.ogm=01;35:*.mp4=01;35:*.m4v=01;35:*.mp4v=01;35:*.vob=01;35:*.qt=01;35:*.nuv=01;35:*.wmv=01;35:*.asf=01;35:*.rm=01;35:*.rmvb=01;35:*.flc=01;35:*.avi=01;35:*.fli=01;35:*.flv=01;35:*.gl=01;35:*.dl=01;35:*.xcf=01;35:*.xwd=01;35:*.yuv=01;35:*.cgm=01;35:*.emf=01;35:*.axv=01;35:*.anx=01;35:*.ogv=01;35:*.ogx=01;35:*.aac=00;36:*.au=00;36:*.flac=00;36:*.mid=00;36:*.midi=00;36:*.mka=00;36:*.mp3=00;36:*.mpc=00;36:*.ogg=00;36:*.ra=00;36:*.wav=00;36:*.axa=00;36:*.oga=00;36:*.spx=00;36:*.xspf=00;36:';
export LS_COLORS

export PS1="\\[$(tput bold)\\]\\[$(tput setaf 1)\\]\\[$(tput setab 8)\\]
"\\u\\[$(tput setaf 5)\\]@\\[$(tput setaf 1)\\]`hostname`"\\[$(tput setaf 2)\\] : ""`uname`"" : \\[$(tput setaf 6)\\]""\d \t : ""`echo $PLANTID`""
"[\\w]'\$\[$(tput sgr0)\] '
Database Install and Configuration
Configure MariaDB
Run the following
systemctl edit mariadb.serviceThen add the following to the file in between these lines
### Editing /etc/systemd/system/mariadb.service.d/override.conf
### Anything between here and the comment below will become the new contents of the file

[Service]
LimitNOFILE=32768

### Lines below this comment will be discarded
Run the following
vi /etc/my.cnf.d/client.cnfAdd the following below the [client] section
socket=/var/lib/mysql/mysql.sockRun the following
vi /etc/my.cnf.d/mariadb-server.cnfAdd the following below the [mysqld] section and you will have to use the :set paste command or it will not paste correctly
#Custom
performance_schema = ON
tmpdir = /run/mariadb
thread_cache_size = 4
table_open_cache = 16384
table_definition_cache = 8384
sql_mode = ERROR_FOR_DIVISION_BY_ZERO,NO_AUTO_CREATE_USER,NO_ENGINE_SUBSTITUTION

query_cache_type = 0
query_cache_size = 0
query_cache_limit = 128M
query_cache_strip_comments = 1

tmp_table_size = 512M
max_heap_table_size = 512M

max_connections = 512
max_allowed_packet = 24M
sort_buffer_size = 24M
join_buffer_size = 48M

innodb_buffer_pool_size = 4G
innodb_buffer_pool_instances = 4
innodb_use_native_aio = 1
innodb_flush_log_at_trx_commit = 0
innodb_file_per_table
innodb_log_file_size = 512M

#Optional configuration for transaction loggin
log_bin = /var/log/mariadb/mariadb.log
expire_logs_days = 2
Reload the changes
systemctl daemon-reloadEnable and start MySQL/MariaDB on boot
systemctl enable --now mariadb.service
echo > /etc/logrotate.d/mariadb
Run the following
mysqlThen execute the following statements also make sure to (change passwords as needed XXXXXXXXXX but NOT the users names)
CREATE USER 'kiwisql'@'%' IDENTIFIED BY 'XXXXXXXXXX';
GRANT all ON *.* TO 'kiwisql'@'%' WITH GRANT OPTION;
CREATE USER 'kiwisql'@'localhost' IDENTIFIED BY 'XXXXXXXXXX';
GRANT all ON *.* TO 'kiwisql'@'localhost' WITH GRANT OPTION;
CREATE USER 'kiwilive'@'localhost' IDENTIFIED BY 'XXXXXXXXXX';
GRANT all ON *.* TO 'kiwilive'@'localhost';
CREATE USER 'remuser'@'localhost' IDENTIFIED BY 'XXXXXXXXXX';
GRANT all ON *.* TO 'remuser'@'localhost' WITH GRANT OPTION;
CREATE USER 'reports'@'%' IDENTIFIED BY 'XXXXXXXXXX';
GRANT SHOW DATABASES, SELECT, EXECUTE, PROCESS, SHOW VIEW  ON *.* TO 'reports'@'%';
FLUSH PRIVILEGES;
Quit
Build skeleton for the Kiwiplan Environment
Command to Run
Setup the user environment
Remember to change the remuser & esp password
ESP username password is the global password store in ESP to let it connect and is unfortunately visible to an admin user but please make sure to (change passwords as needed XXXXXXXXXX but NOT the users names)
groupadd kiwiplan
mkdir /opt/kiwi
ln -s /opt/kiwi/ /KIWI
mkdir /opt/kiwi/{home,rev}
mkdir /opt/kiwi/rev/{map,mes}
useradd -g kiwiplan -G wheel -d /KIWI/home/remuser/ remuser
echo XXXXXXXXXX | passwd --stdin remuser
useradd -g kiwiplan -d /KIWI/home/esp/ esp
echo XXXXXXXXXX | passwd --stdin esp
chown -R remuser:kiwiplan /opt/kiwi
mkdir /etc/kiwiplan
chown remuser:kiwiplan /etc/kiwiplan
Systemd Socket Implementation For KIDD
Configure kidd.stocket
Remember your :set paste command
Create a socket file and the following
vi /lib/systemd/system/kidd.socketThen add the following
[Unit]
Description=KIDD
[Socket]
ListenStream=2326
Accept=yes

[Install]
WantedBy=sockets.target
Create a service file by editing the following
vi /lib/systemd/system/kidd@.serviceThen add the following
[Unit]
Description=Kidd Server
[Service]
ExecStart=/KIWI/rev/current/progs/kidd
User=root
Group=root
StandardInput=socket
StandardOutput=socket

# Resource configuration
LimitNOFILE=8192
LimitNPROC=4096

# MaxConnections=nnn - The maximum number of connections to simultaneously run services instances for
#  when Accept=true is set. nnn should be sized accordingly for the implementation.
MaxConnections=200

# The maximum number of connections for a service per source IP address.
# This is very similar to the MaxConnections= directive above. Disabled by default.
MaxConnectionsPerSource=80
Start the service and enable on reboot
systemctl start kidd.socket
systemctl enable kidd.socket
This will only work once you have the Kiwiplan environment configured/installed
VUE Installation Configurations
Adjust system limits for VUE products
Edit the following
vi /etc/security/limits.d/20-nproc.confAdd the following
@kiwiplan soft nproc 32768Edit the following
vi /etc/security/limits.confThen add the following before the #End of file
@kiwiplan - nofile 32768Installing MsSQL Tool
Configure MsSQL tools
Install the repo for the MsSQL service/connection
curl https://packages.microsoft.com/config/rhel/8/prod.repo > /etc/yum.repos.d/msprod.repoThis will only work once you have the Kiwiplan environment configured/installed
Install the packages make sure you answer/type YES to all
dnf remove mssql-tools unixODBC-utf16-devel
dnf install mssql-tools unixODBC-devel -y
STOP HERE FOR YOUR TEMPLATE BUILD
RESTART FROM HERE AFTER TEMPLATE BUILD
Linux RedHat Registration
Re-Register the server with RedHat if you entered initial credentials to add the server
You need to run the nmtui command to bring up the menu from above in this documentation and then simply change the IP and also the hostname
Run the following and this will change the subscription details
subscription-manager register --force
subscription-manager attach --auto
Activate Directory Setup
Using SSSD
Install the following packages
yum install sssd sssd-tools realmd samba-common-tools oddjob oddjob-mkhomedir adcli samba -yRun this just in-case your domain is still using RC4
update-crypto-policies --set DEFAULT:AD-SUPPORTConfigure KRB5
Edit the following file and make sure the following is added/changed
vi /etc/krb5.confAdd or changed the following below
|
# To opt out of the system crypto-policies configuration of krb5, remove the [logging] [libdefaults] dns_canonicalize_hostname = fallback qualify_shortname = "" default_realm = ONLING.COM
[realms] [domain_realm] |
Join the server to the domain
Configurating the SSSD (in yellow update to site specific) (in green needs to be capitalized)
You must have the access to add to the AD server or the server has to be add first before you run the following command.
For the join you may need to specify the -OU's for the specific location
|
# realm discover onling.com # realm join -U administrator@ONLING.COM --verbose domain_controller.onling.com # authselect select sssd with-mkhomedir # authselect apply-changes |
Copy from below and make changes
realm discover onling.com
realm join -U administrator@ONLING.COM --verbose domain_controller.onling.com
authselect select sssd with-mkhomedir
authselect apply-changes
Update SSSD config
Once joined then you can change or add the following parameters
vi /etc/sssd/sssd.conf|
[sssd] domains = onling.com config_file_version = 2 services = nss, pam
[domain/onling.com] default_shell = /bin/bash ad_server = sfl-dom-001.onling.com krb5_store_password_if_offline = True cache_credentials = True krb5_realm = ONLING.COM realmd_tags = manages-system joined-with-adcli id_provider = ad fallback_homedir = /home/%d/%u ad_domain = onling.com use_fully_qualified_names = false ldap_id_mapping = True access_provider = ad override_gid = 1000 |
Restarting SSSD
systemctl stop sssd; sss_cache -E; systemctl start sssdOptional SSSD configurations
Defaults to no Shell Access, allows short usernames
Optional (Group allow) additional parameters and changes
|
simple_allow_groups = sssd-users OR simple_allow_groups = gg-C3193???-KiwiTS_access |
Add users to SSSD
Optional grant shell access and force primary group to kiwiplan, change john.doe to the username
sss_override user-add john.doe -g $(getent group kiwiplan | cut -d: -f3) -s /bin/bash -h /KIWI/home/john.doe