Docker
This page had now moved here
- PiHole - Synology Configuration
- .gitignore - .gitIgnore File for Docker Compose Files
- RustDesk - pfSense and and HAProxy
- PODMAN - Install Podman on Linux Redhat
PiHole - Synology Configuration
This is to create a MAC vlan on you synology to bridge interfaces
You will need to create the following folders from the main docker folder.
mkdir -p /volume1/docker/pihole
mkdir -p /volume1/docker/pihole/pihole
mkdir -p /volume1/docker/pihole/dnsmasq.d
My testing vlan uses 192.168.253.0/24
sudo docker network create -d macvlan -o parent=eth3 --subnet=192.168.253.0/24 --gateway=192.168.253.1 --ip-range=192.168.253.44/32 ph_networkYAML Configurations
services:
  pihole:
    image: pihole/pihole:latest
    container_name: pihole
    hostname: pihole
    security_opt:
      - no-new-privileges=false
    networks:
      - ph_network
      - ph_bridge
    environment:
      PIHOLE_GID: 100
      PIHOLE_UID: 1024
      DNSMASQ_USER: root
      TZ: 'America/Montreal'
      FTLCONF_webserver_api_password: '[Your_Password_Here]'
      #FTLCONF_webserver_port: 8080
      FTLCONF_dns_listeningMode: all
      DNSMASQ_LISTENING: local
    volumes:
      - /volume1/docker/pihole/pihole:/etc/pihole
      - /volume1/docker/pihole/dnsmasq.d:/etc/dnsmasq.d
      - /etc/localtime:/etc/localtime:ro
    cap_add:
      - NET_ADMIN
      - SYS_TIME
      - SYS_NICE
    restart: on-failure:5
networks:
    ph_bridge:
      driver: bridge
      ipam:
        config:
          - subnet: 192.168.100.0/24
            gateway: 192.168.100.1
            ip_range: 192.168.100.2/32
    ph_network:
      name: ph_network
      external: true
Accessing the pi-hole remotely
https://192.1638.253.44/admin
If you are 7.1 DSM you will need to use this command
docker-compose -f /volume1/docker/pihole/compose.yaml up -d.gitignore - .gitIgnore File for Docker Compose Files
Use Case TrueNAS shared SMB with a folder dedicated to yaml files.
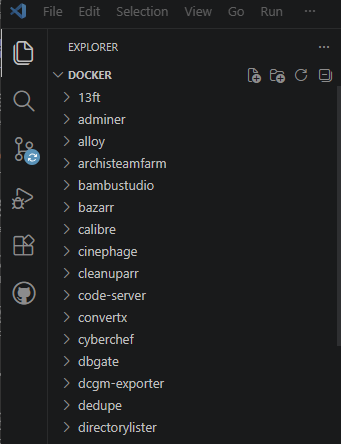
This is it to be used if you have a SMB drive and point Visual Code or Code Server to all of your docker folders.
The .gitignore file setup
# Ignore everything by default
*

# Allow directories to be traversed
!*/

# Include YAML files
!*.yaml
!*.yml
!.env
!env.*

# Include .gitignore and .gitattributes files
!.gitignore
!.gitattributes
RustDesk - pfSense and and HAProxy
You can configure self-hosted RustDesk (hbbs ID/rendezvous server + hbbr relay server) behind your pfSense + HAProxy Docker setup using hostname.domain.com as the external ID server address. However, there are important caveats due to how RustDesk works.
Important Limitations with HAProxy for RustDesk
RustDesk uses a custom protocol (not HTTP/HTTPS) with:
- TCP ports: 21115 (hbbs signaling), 21116 (hbbs), 21117 (hbbr relay)
- UDP port: 21116 (critical for NAT traversal / hole punching)
- Optional WebSocket ports 21118/21119 (only needed for the web client)
HAProxy (even in TCP mode) is not ideal for the core RustDesk traffic:
- It cannot properly proxy UDP 21116 (HAProxy's UDP support is very limited and not suitable here).
- Even in TCP mode, the real client IP is hidden (hbbs sees the HAProxy container's IP), which breaks NAT hole-punching and forces everything through the relay.
- Domain-based routing (
hostname.domain.com) doesn't help because RustDesk clients connect directly to the resolved IP + specific ports — there is no Host header or SNI to route on.
Recommended approach: Use pfSense Port Forward / NAT rules for the RustDesk ports (direct to your RustDesk Docker host/container). Keep HAProxy for your HTTP/HTTPS services only. This is the most reliable way and what most people successfully use with pfSense + RustDesk.
If you must route everything through HAProxy Docker, it's possible for the TCP ports only (see advanced section at the end), but UDP will still need a direct forward and performance/reliability will suffer.
Step-by-Step Recommended Setup (Direct pfSense NAT + Domain)
-
Set up DNS
- Create an A record (and AAAA if IPv6) for
hostname.domain.compointing to your pfSense WAN public IP. - No special subdomains or paths needed.
- Create an A record (and AAAA if IPv6) for
-
Run RustDesk Server in Docker (on your internal host/VM/LXC behind pfSense) You can also choose to use the official Docker Compose (download
oss.ymlfrom RustDesk or use this standard one):services: hbbs: # ID / signaling server container_name: hbbs image: rustdesk/rustdesk-server:latest command: hbbs -r {REMOTE HOSTNAME}:21117 logging: driver: json-file options: max-file: ${DOCKERLOGGING_MAXFILE:-10} max-size: ${DOCKERLOGGING_MAXSIZE:-200k} ports: - "21115:21115" - "21116:21116" - "21116:21116/udp" - "21118:21118" volumes: - ${DOCKERFOLDER}/rustdesk/data:/root depends_on: - hbbr restart: unless-stopped hbbr: # Relay server container_name: hbbr image: rustdesk/rustdesk-server:latest command: hbbr logging: driver: json-file options: max-file: ${DOCKERLOGGING_MAXFILE:-10} max-size: ${DOCKERLOGGING_MAXSIZE:-200k} ports: - "21117:21117" - "21119:21119" volumes: - ${DOCKERFOLDER}/rustdesk/data:/root restart: unless-stopped- Run with
docker compose up -d. - The
./datafolder will contain yourencryptionkey pair (id_ed25519.pub). - Check logs:
docker logs hbbs→ look for the public key (you’ll need this in clients).
- Run with
-
pfSense Configuration (Port Forwards + Firewall Rules) Go to Firewall → NAT → Port Forward and create these rules (all source = WAN, destination = your RustDesk Docker host’s internal IP):
Protocol Destination Port Forward to IP Forward to Port Notes TCP 21115 RustDesk Docker IP 21115 hbbs signaling TCP 21116 RustDesk Docker IP 21116 hbbs UDP 21116 RustDesk Docker IP 21116 Critical for hole punching TCP 21117 RustDesk Docker IP 21117 hbbr relay - Set Source port range to any (RustDesk clients use random source ports).
- Auto-create the associated firewall rules (or manually create matching WAN rules under Firewall → Rules → WAN allowing the same ports).
Optional but recommended:
- Enable System → Advanced → Firewall & NAT → NAT Reflection (Pure NAT mode) if you want LAN clients to reach the server via the public domain.
-
Client Configuration On every RustDesk client (Windows/macOS/Linux/Android/iOS):
- Go to Settings → ID/Relay Server
- ID Server: hostname.domain.com (or
hostname.domain.com:21115if you changed the port) - Relay Server: leave blank (hbbs will tell clients to use
hostname.domain.com:21117) - Key: paste the public key from your
./data/id_ed25519.pubfile
-
Test
- From outside your network, connect using an ID from one of your machines.
- Check connection type in the session (should be "Direct" most of the time; falls back to "Relay" if needed).
- Monitor logs:
docker logs hbbsanddocker logs hbbr.
Advanced: Forcing Everything Through HAProxy Docker (Not Recommended)
If you really want HAProxy as the single entry point:
-
Forward all the ports above from pfSense WAN → your HAProxy Docker container IP (instead of directly to RustDesk).
-
In your HAProxy config (or pfSense HAProxy package if you're using that), add TCP-mode frontends/backends for each TCP port:
frontend rustdesk_hbbs_21115 bind :21115 mode tcp default_backend rustdesk_hbbs backend rustdesk_hbbs mode tcp server hbbs rustdesk-docker-ip:21115 # Repeat for 21116 (TCP only), 21117, etc. -
UDP 21116 → still do a direct pfSense NAT forward to the RustDesk container (bypassing HAProxy).
-
You will likely have NAT traversal issues because of the hidden client IP.
For the RustDesk Web Client only (if you use it), you can proxy the WebSocket ports (21118/21119) through HAProxy in HTTP mode with proper Upgrade headers — similar to the official Nginx example in the RustDesk docs.
This direct pfSense NAT + domain setup is what works reliably for almost everyone running RustDesk behind pfSense. Let me know if you hit any specific error logs or need the exact Docker Compose / HAProxy snippets adjusted for your environment!
PODMAN - Install Podman on Linux Redhat
Production-Ready Step-by-Step Guide Rootless Podman + Quadlet on Red Hat Enterprise Linux 10
This guide is designed for a production environment as assums a fresh install of Redhat. It uses the modern Quadlet method (recommended) and follows Red Hat best practices for RHEL 10.
1. System Requirements (Production)
| Resource | Minimum | Recommended (Production) | Our Systems |
|---|---|---|---|
| CPU | 2 cores | 4+ cores | 8 cores |
| RAM | 4 GB | 8–16 GB+ | 32 GB |
| Disk | 40 GB free | 100 GB+ (SSD preferred) | 350 GB |
| cgroup | cgroup v2 | cgroup v2 (required) | |
| SELinux | Enforcing | Enforcing |
Check cgroup version:
podman info --format '{{.Host.CgroupVersion}}'Epel Release
subscription-manager repos --enable codeready-builder-for-rhel-10-$(arch)-rpms
dnf install https://dl.fedoraproject.org/pub/epel/epel-release-latest-10.noarch.rpm -y
After Epel installation rerun the upgrade to update if any are needed
dnf upgrade -ydnf install bind-utils bzip2 cups cifs-utils enscript ftp gdb ghostscript krb5-workstation ksh lftp lrzsz lsof libnsl lzop plocate mutt ncompress net-tools net-snmp net-snmp-utils net-tools nfs-utils nmap nvme-cli openldap-clients openssh-clients psmisc realmd rsync samba-client strace sysstat tcpdump telnet telnet-server tmux unix2dos vim vim-enhanced vsftpd wget xfsdump vsftpd htop mc rsyslog rsyslog-doc postfix dbus-daemon s-nail dovecot cyrus-sasl cyrus-sasl-lib cyrus-sasl-plain tree figlet toilet coreutils -y2. Prepare the System
2.1 Register and Update RHEL 10
sudo dnf update -y
sudo reboot
2.2 Install Container Tools
sudo dnf install -y container-toolsOptional (Docker CLI compatibility):
sudo dnf install -y podman-dockerVerify:
podman --version
podman info
3. Create a Dedicated Service User (Best Practice)
For production, avoid running services under a regular interactive user.
# Create a system user for containers
sudo useradd -r -m -d /home/podman -s /bin/bash podman

# Set a strong password or disable password login
sudo passwd podman          # or lock the account later
Grant subordinate UIDs/GIDs (required for rootless):
sudo usermod --add-subuids 100000-165535 --add-subgids 100000-165535 podman4. Enable Lingering (Critical for Production)
This allows the user services to run even when the user is not logged in.
sudo loginctl enable-linger podmanVerify:
loginctl show-user podman | grep Linger
# Linger=yes
5. Configure Rootless Environment
Switch to the service user:
sudo -u podman -iCreate required directories:
mkdir -p ~/.config/containers/systemd
mkdir -p ~/.config/containers
mkdir -p ~/.local/share/containers
Optional but Recommended: Storage Configuration
cat > ~/.config/containers/storage.conf << 'EOF'
[storage]
driver = "overlay"
runroot = "/run/user/$(id -u)/containers"
graphroot = "$HOME/.local/share/containers/storage"

[storage.options.overlay]
mount_program = "/usr/bin/fuse-overlayfs"
mountopt = "nodev,fsync=0"
EOF
Optional: Registries Configuration
cat > ~/.config/containers/registries.conf << 'EOF'
unqualified-search-registries = ["registry.access.redhat.com", "registry.redhat.io", "docker.io", "quay.io"]

[[registry]]
location = "docker.io"
insecure = false
EOF
6. Create Your First Production Quadlet
A) Example: Nginx reverse proxy / web service
cat > ~/.config/containers/systemd/nginx.container << 'EOF'
[Unit]
Description=Nginx Web Server (Production)
After=network-online.target
Wants=network-online.target

[Container]
Image=docker.io/library/nginx:alpine
ContainerName=nginx
PublishPort=8080:80
Volume=nginx-data.volume:/usr/share/nginx/html:Z
Volume=nginx-conf.volume:/etc/nginx/conf.d:Z
AutoUpdate=registry
Environment=TZ=America/New_York
PodmanArgs=--memory=512m --cpus=1.0 --memory-swap=512m

[Service]
Restart=always
TimeoutStartSec=300

[Install]
WantedBy=default.target
EOF
A) Create supporting volumes:
cat > ~/.config/containers/systemd/nginx-data.volume << 'EOF'
[Volume]
VolumeName=nginx-data
EOF

cat > ~/.config/containers/systemd/nginx-conf.volume << 'EOF'
[Volume]
VolumeName=nginx-conf
EOFcat > ~/.config/containers/systemd/myapp.container << 'EOF'
[Unit]
Description=My Application (Production)
After=network-online.target
Wants=network-online.target
[Container]
Image=your-registry/your-app:latest
ContainerName=myapp
PublishPort=8080:8080
Volume=myapp-data.volume:/data:Z
AutoUpdate=registry
Environment=TZ=America/New_York
PodmanArgs=--memory=1g --cpus=1.5 --memory-swap=1g
[Service]
Restart=always
TimeoutStartSec=300
[Install]
WantedBy=default.target
EOFB) Create supporting volume:
cat > ~/.config/containers/systemd/myapp-data.volume << 'EOF'
[Volume]
VolumeName=myapp-data
EOF
7. Activate the Service
A) Example for Nginx
# Reload systemd user units
systemctl --user daemon-reload

# Start and enable
systemctl --user enable --now nginx.service

# Check status
systemctl --user status nginx.service
podman ps
View logs:
journalctl --user -u nginx.service -fsystemctl --user daemon-reload
systemctl --user enable --now myapp.service
# Verify
systemctl --user status myapp.service
podman psView logs:
journalctl --user -u myapp.service -f
8. Configure pfSense HAProxy
In pfSense HAProxy:
- Backend
- Mode: http
- Server: IP of your RHEL 10 host
- Port: 8080 (or whatever you published)
- Health check: recommended
- Frontend
- Bind to WAN / desired interface
- TLS offloading (recommended)
- ACL based on Host header (e.g. hdr(host) -i app.yourdomain.com)
- Use backend created above
- Firewall Rules
- Allow traffic from HAProxy (or LAN) to the RHEL host on the published port(s) only.
Firewall example:
sudo firewall-cmd --permanent --add-port=8080/tcp
sudo firewall-cmd --reload
9. Production Hardening Checklist
| Item | Command / Action | Status |
|---|---|---|
| SELinux | Keep enforcing | ☐ |
| Linger enabled | loginctl show-user podman | ☐ |
| Resource limits | Set in Quadlet (--memory, --cpus) | ☐ |
| Auto-update | AutoUpdate=registry in Quadlet | ☐ |
| Firewall | Open only required ports | ☐ |
| Log rotation | Configure journald or ship logs | ☐ |
| Image scanning | Use podman image scan or external scanner | ☐ |
| Backup volumes | Backup ~/.local/share/containers | ☐ |
| Non-interactive user | Disable password / use key-based access only | ☐ |
|
Log management |
journalctl --user or forward logs |
Enable auto-update timer (as podman user):
systemctl --user enable --now podman-auto-update.timer9. Useful Management Commands
# List all user services
systemctl --user list-units --type=service

# Restart a service
systemctl --user restart nginx.service

# Stop a service
systemctl --user stop nginx.service

# View resource usage
podman stats

# Update all containers with AutoUpdate
podman auto-update# Service management
systemctl --user status myapp.service
systemctl --user restart myapp.service
systemctl --user stop myapp.service
# Container status & resources
podman ps
podman stats
# Logs
journalctl --user -u myapp.service -f
# Manual update
podman auto-update
10. Optional: Auto-Update Timer
Enable Podman’s auto-update timer (as the podman user):
systemctl --user enable --now podman-auto-update.timerSummary of Key Directories (Rootless)
| Purpose | Path |
|---|---|
| Quadlet files | ~/.config/containers/systemd/ |
| Container storage | ~/.local/share/containers/storage/ |
| User systemd units | ~/.config/systemd/user/ |
| Configuration | ~/.config/containers/ |
Summary
- HAProxy on pfSense = edge reverse proxy / TLS / routing
- RHEL 10 + rootless Podman + Quadlet = application runtime
- No Nginx needed unless the application itself requires it